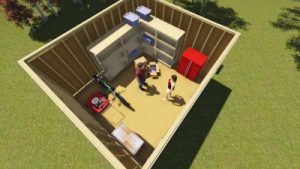
As you start to see your shed take shape, inevitably you will start to think about how to store and organize the things you plan on keeping in your shed. I wanted to dive into some cool shelving tips and ideas that might help you keep your stuff organized!
Three Shelving Tips
#1 Design it first. Sketch on paper your wall dimensions and where you think shelves would work. Keep in mind items that you would store on the ground (lawnmower, gas cans, generators, snowblowers, etc). You probably want to have a minimum of 24 inch clearance from the ground.
#2 Have the right tools: For this project, you will need a measuring tape, nail gun and compressor (or a hammer), a miter saw or circular circle, a speed square, level, and of course a pencil for marking.
#3 Get the right materials. Plan out on paper how many studs and sheets of OSB you will need. Also don’t forget your nails and glue.
3 Different Ways to build your shelves
Full Width Shelves

This full width shelf design by oneprojectcloser.com is easy to design and build. The first step is to glue and nail support studs to the three walls (each side wall and the main wall you will attach the shelf to). Then build (cut, glue, and nail) your shelf on the floor using studs on end and a sheet of plywood or osb as the top. Make sure you measure twice and cut once! After your shelf is built, simple lift it into place on top of your existing stud supports and throw a few nails (with glue of course) to keep it in place. Having three areas of support really gives you a strong shelf.
Corner Shelving Unit
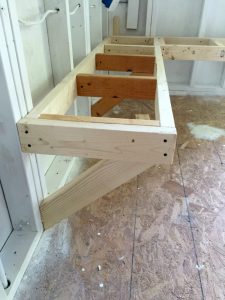
If you want to extent your shed shelving around a corner, you might want to incorporate some bracing on the edges of the shelf unit. I found this image on athomewiththebarkers.com. They used 45 degree angles to brace the edge of their shelf. I would prefer this method over placing a stud in front or underneath the front of the shelf that goes straight down to the ground. Having an angled support leaves room to store items under the shelves more easily. I would suggest putting a brace every 16″ on center (wherever you have an existing wall stud). It’s probably overkill but you never know how much weight is going to be on these things.
Independent Shelving Unit
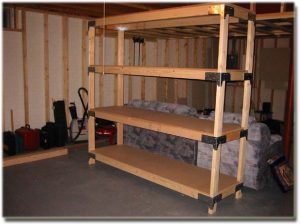
A third option is to built a standalone shelving rack that you could move around as needs be. I found this great shed unit at sahm-one.net. The shelves are built the same way as above but you are adding studs to each of the four corners. Then added reforcing metal brackets to each joint to keep everything nice and strong. A very strong and mobile shed shelving option.
Good luck with your next shed shelving project!

